Overload soccer drills are designed to create numerical advantages for one team over another. By giving players more teammates than defenders, coaches can develop passing, movement, decision-making, and the ability to exploit space under pressure.
Overloads are commonly used to teach possession play, attacking principles, pressing resistance, and combination play. They can also be adjusted easily for different age groups and ability levels.
The overload drills below are organised around creating and exploiting numerical advantages, helping players learn when to pass, move, support, and attack space effectively.
What Overload Soccer Drills Improve
- Passing & Support Play: Improve passing options, movement off the ball, and support angles around the player in possession.
- Decision-Making: Develop the ability to identify numerical advantages and choose the best passing or dribbling option.
- Possession Under Pressure: Encourage players to maintain possession while facing defensive pressure.
- Attacking Movement: Teach players how to exploit space and create scoring opportunities when they have an extra player.
- Teamwork & Communication: Improve communication, movement, and understanding between teammates.
Table of Contents
- 2v1 Overload
- 2v1 Overload Neutral Player
- 4v2 Overload
- Overload SSG
- 4v3 Overload
- 4v2 Possession Overload
- 6v4 Possession Overload
Creating Numerical Advantages
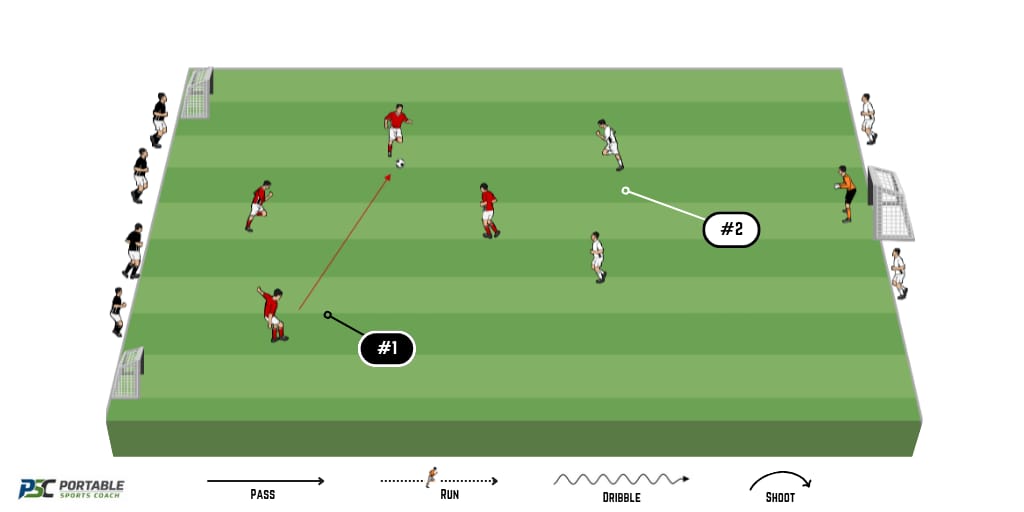
2v1 Overload
- Objective
- Improve passing, movement, and decision-making when attacking with a numerical advantage.
- How It Works
- Two attackers work together against a single defender. The attackers must use quick passing and movement to retain possession and exploit the extra player, while the defender attempts to win the ball.
- Coaching Focus
- Create good passing angles
- Move immediately after passing
- Recognise when to pass and when to dribble
- Use the spare player effectively
- Stay composed under pressure
- Progression
- Limit the attackers to two touches to increase the speed of play and decision-making.
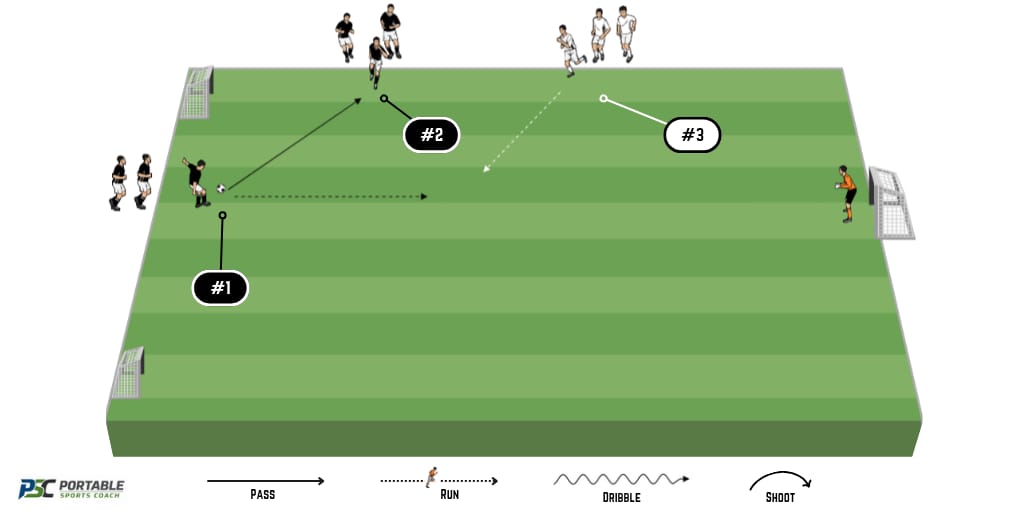
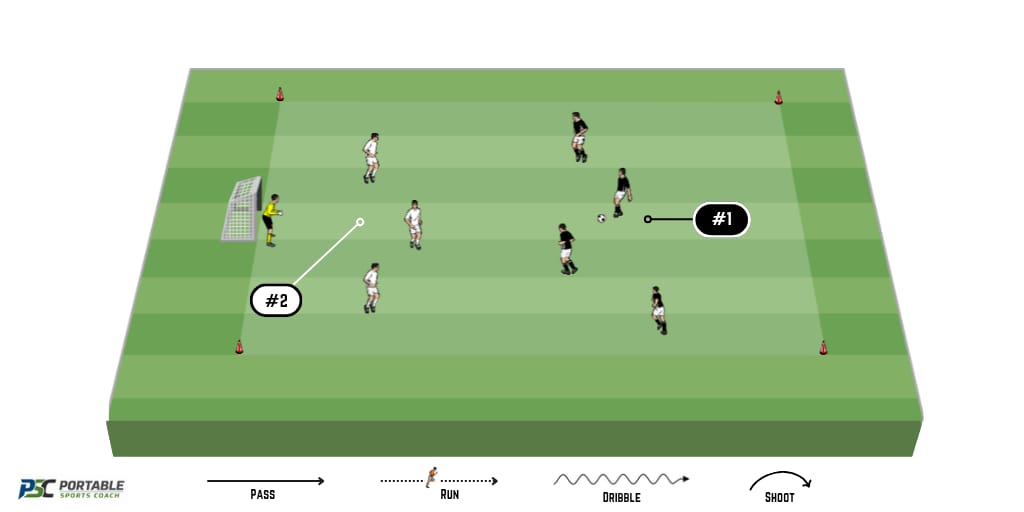
2v1 Overload Neutral Player
- Objective: Improve support play, passing combinations, and the ability to create numerical advantages.
- How It Works
- Two attackers combine with a neutral player to create an overload against a defender. The neutral player always supports the team in possession, giving attackers additional passing options and encouraging combination play.
- Coaching Focus
- Use the neutral player to maintain possession
- Create passing lanes and support angles
- Scan before receiving the ball
- Move to support teammates
- Play with speed and purpose
- Progression
- Restrict the neutral player to one touch to encourage quicker ball movement.
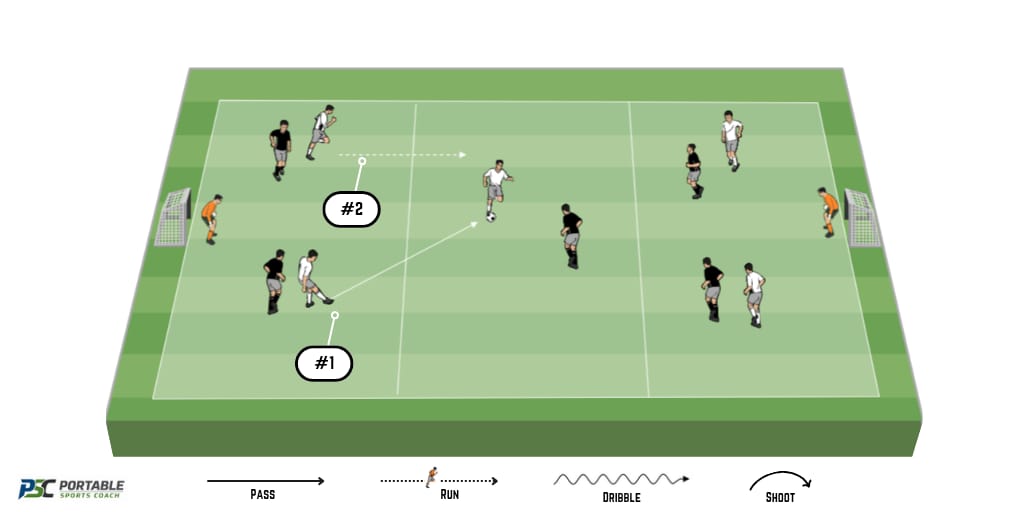
4v2 Overload
- Objective: Improve passing, support play, and possession under defensive pressure.
- How It Works
- Four attackers work together to maintain possession against two defenders. The attacking team must create passing angles, move off the ball, and use the numerical advantage to keep possession, while defenders attempt to win the ball and force mistakes.
- Coaching Focus
- Create passing options for teammates
- Scan before receiving the ball
- Play away from pressure
- Support the player in possession
- Move the ball quickly to exploit the overload
- Progression
- Reduce the size of the playing area to increase pressure and speed of play.
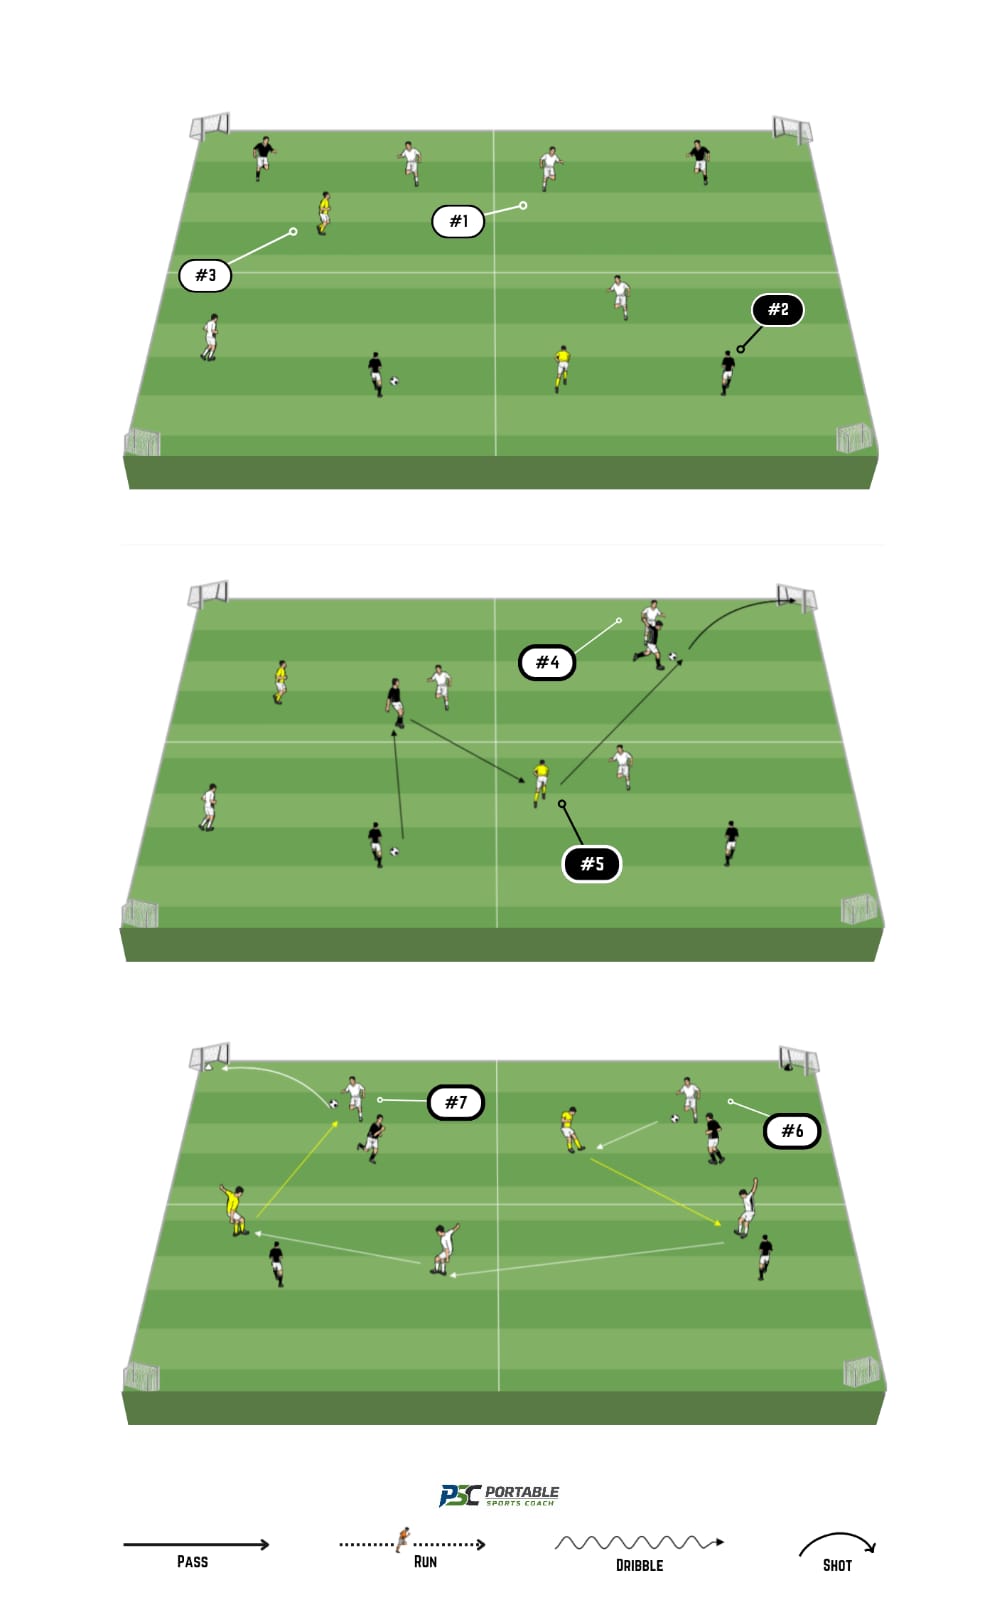
Overload SSG
- Objective
- Improve decision-making, teamwork, and the ability to exploit numerical advantages in game situations.
- How It Works
- Teams compete in a small-sided game where one team has an extra player. The attacking team must use the overload to create chances and maintain possession, while the defending team works to stay compact and regain the ball.
- Coaching Focus
- Identify where the spare player is
- Switch play to exploit space
- Support attacks with movement off the ball
- Communicate with teammates
- Attack with speed when opportunities appear
- Progression
- Allow the overload to change teams whenever possession changes to create transition moments.
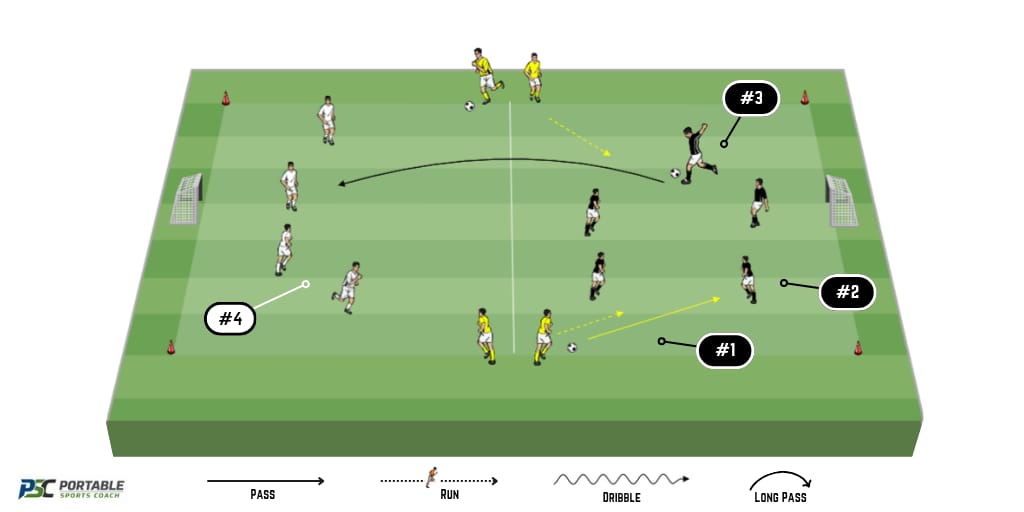
4v3 Overload
- Objective: Improve the ability to create and exploit numerical advantages in possession-based situations.
- How It Works
- Four attackers compete against three defenders inside the playing area. The attacking team must use the extra player to circulate possession, create passing angles, and manipulate the defensive shape to maintain control of the ball.
- Coaching Focus
- Identify where the overload exists
- Move the ball away from pressure
- Create supporting angles around the ball
- Stay patient in possession
- Use the spare player to retain control
- Progression
- Allow defenders to counterattack immediately after winning possession.
4v2 Possession Overload
- Objective: Improve ball retention, support play, and quick decision-making under pressure.
- How It Works
- Four attackers attempt to maintain possession against two defenders. The numerical advantage allows the attacking team to focus on movement, passing combinations, and creating continuous support around the ball.
- Coaching Focus
- Create passing triangles
- Scan before receiving
- Support from multiple angles
- Play with speed and accuracy
- Maintain possession with purpose
- Progression
- Reduce the size of the playing area to increase defensive pressure.
6v4 Possession Overload
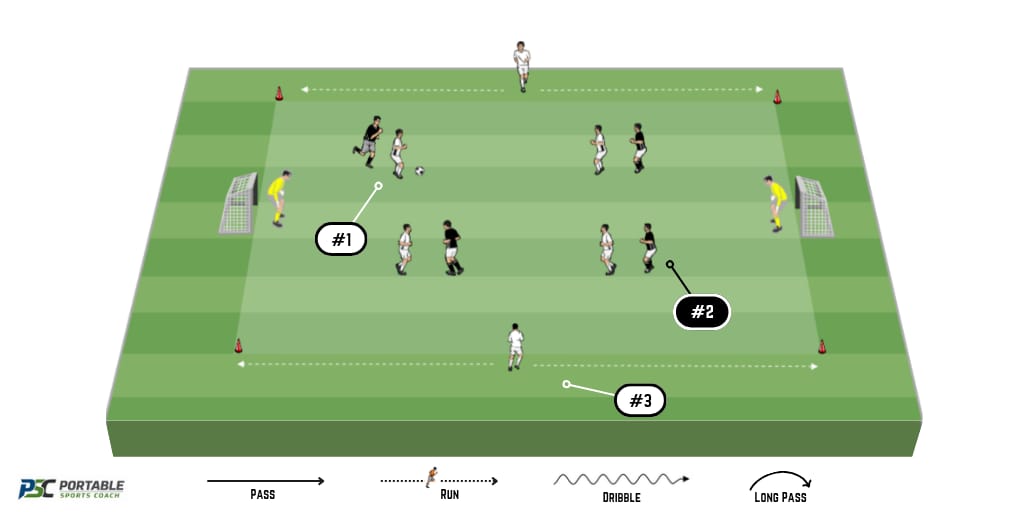
- Objective: Develop team possession principles and the ability to use numerical superiority in larger game situations.
- How It Works
- Six attackers work together against four defenders to maintain possession and progress the ball. Players must recognise where space exists, support teammates effectively, and use the extra players to control the tempo of the practice.
- Coaching Focus
- Exploit free players in space
- Move the ball quickly across the area
- Support behind, beside, and ahead of the ball
- Communicate continuously
- Recognise opportunities to switch play
- Progression
- Introduce directional targets to encourage forward progression and more realistic decision-making.
Frequently Asked Questions
What is an overload in soccer?
An overload occurs when one team has more players than the opposition in a specific area of the field. Coaches use overload drills to teach players how to create and exploit numerical advantages through passing, movement, and teamwork.
Why are overload drills important?
Overload drills help players develop decision-making, support play, and possession skills in realistic game situations. They encourage players to identify the spare player, move into space, and make better choices under pressure.
What age groups should use overload drills?
Overload drills can be adapted for almost any age group. Younger players can start with simple 2v1 activities, while older and more advanced players can progress to larger overload games that involve more tactical decision-making.
How do you make overload drills harder?
You can increase the difficulty by reducing the playing area, limiting touches, increasing defensive pressure, or introducing transition moments where the overload changes when possession is won or lost.
Related Age Group Drills
Overload drills help players understand support play, movement and decision-making in numerical advantage situations. These collections feature drills suitable for older youth players.